Templates
Links
When editing templates you can connect content easily. You can link content to a button, an image, a card or an item from the content settings of each one of them.
There are different types of links, below we explain what they consist of and how to use them:
Link to a template
This link will allow you to link the element you are configuring to one of the templates you have created. For example, you can configure a button to take you to a maintenance form, or an image to take you to a page with information.
Internet URL
This link will allow you to link your item to a URL. You can, for example, link a YouTube video, your website or a page with additional information that you would like to share.
File
Upload a file or a pdf to your Multimedia Library by clicking on the button and add it to your link. In the event that you have uploaded a pdf, you can choose that users can download the file by accessing the link or, by checking the preview option, access a preview of the document. Upload manuals, catalogs or extra information and allow your users easy access.
Phone number
Add a phone number as a link and allow your users to call directly with just one click. Create a button and add an assistance or emergency telephone number. Allow your users to access your number from the app itself.
Contact by email
Link an email to a button, image or item so that your users can access your email and send you an email directly by clicking the link. Perfect for linking information or contact mail.
Link depending on the app
A conditional link is a type of link that allows you to link any of the link types that we have seen depending on the app to which the visited tag belongs. You will be able to generate different types of apps and, with the same template, show different content depending on the app you visit.
Entity
Entity is a type of Link that allows you to link your block to the current entity, its parent, or its current parent, as long as the block allows you to view them.
In the case of: another of my templates, internet URL and file, you can choose if you want the link to open in a new window, which would allow you to keep your app open while viewing the content of the link.
How to create a link
You will have to first select the type of Content in which you want to add the link. To do this, when you add some type of content to your App, such as an image or a button, the option to add a link will appear within its configuration.
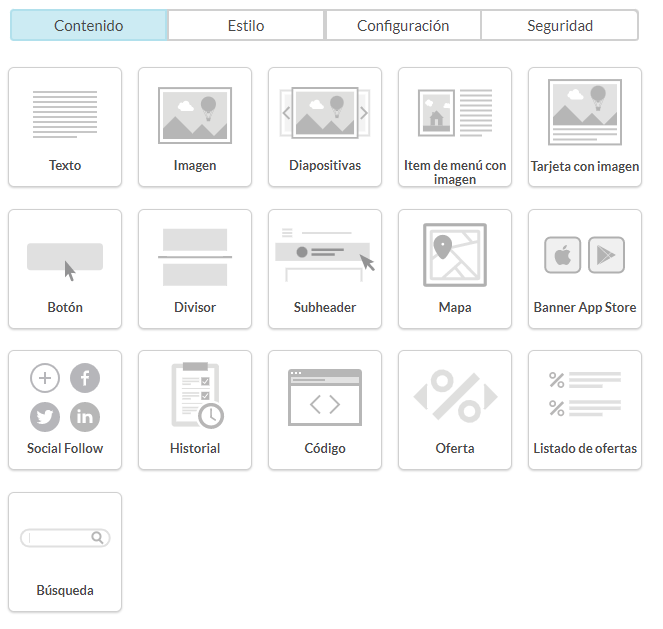
In this example below, it is the menu that appears when adding the content block that contains an "Image".
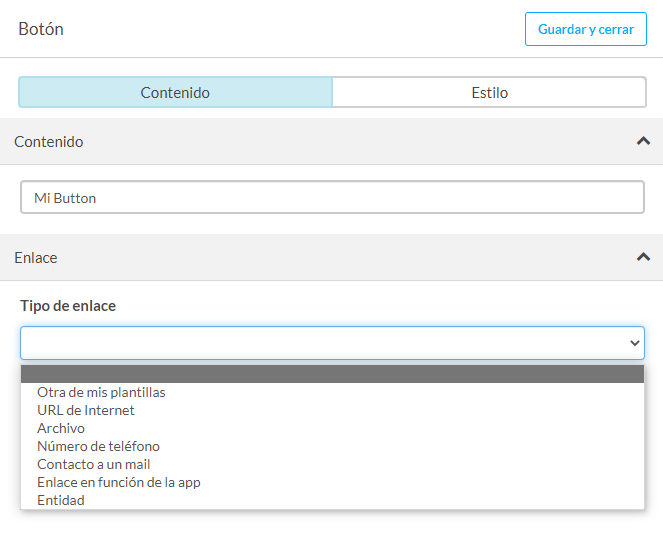
In the type of link we can select the type of link as we have described at the beginning of this article. And from here, give the specifications you need at all times to give your App the best possible navigability.
Menu
The menu of the App in TicTAP is an essential element for the user to be able to navigate through the different sections of the App. It is a very important element, since it is the first thing the user sees when they open the App, and it is the first thing they will use to navigate through it.
The menu is created externally, that is, as if it were another independent element outside of your App, in this case a new menu-type template. Then we will return to our App, and from there in the Configuration option and Lateral menu, from there we will select the template-menu created.
Let's go step by step:
Create the template

To create a menu you have to create a new Template from the left menu in the Home of the platform (outside the App). We choose Menu type and assign it a name. The 'menu' template only allows you to add one type of block 'Menu item with image'.
Design your menu
To create your menu, drag as many 'item' blocks as you like and assign content to them. You can link your menu items with other templates, URL's, telephone numbers, emails, files and much more icons or images to accompany the text in the menu, but remember, it will be displayed in a very small size, so avoid putting very detailed content or icons with an excessively thin line.
You can also add color to your menu, and assign specific colors to each of the items. Once you're done, save the changes.
Link the menu to your templates
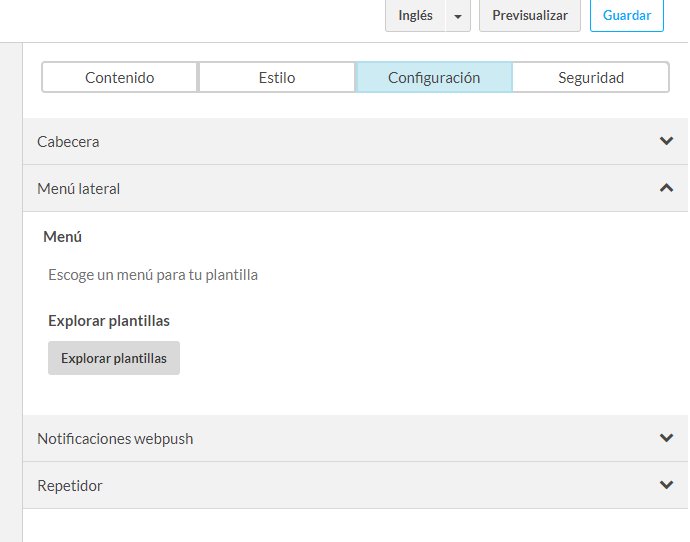
The Menu is created but you have to add it to the other templates of your app. To do this, enter each of the templates (template if you only have one), go to the configuration tab and choose the 'Side Menu' option. Find your menu and assign it with the 'browse templates' option, as shown in the image lower.
Tip: You will have to link your menu in your home template to have it always visible.
Check that everything is ok
Check that the menu is correctly linked by performing a preview of your App, where you will see that it has been added a menu at the top of the Hamburger type. If all is well, enjoy a fast way to access all your content quickly from any template in your app.
How to use variables in templates
Text variables
To use variables in templates you need to use the notation *|VARIABLE_NAME|* . In this way, the content between the delimiters *| and |* will be replaced by whatever value that variable has. Here are some examples of variables you can use:
Tag variables
*|tag.name|* contains the tag name
*|tag.description|* contains the tag description
App variables
*|app.name|* contains the name of the App where the visited tag belongs to.
*|app.description|* contains the App description where the visited tag belongs to.
User variables
*|user.name|* contains the name of the logged in user
*|user.email|* contains the e-mail of the logged-in user
Asset variables
Since in TicTAP a tag can be "stuck" on an asset, the asset information can be accessed through asset variables.
*|asset.name|* contains the asset name. Every asset always has a name
*|asset.external-reference|* contains an external reference of the asset. This is typically used when the asset has an ID other than TicTAP's and it is useful to store it with integration purposes.
*|asset.end-of-life-at|* contains the date when the asset was decommissioned or it is scheduled to be decommissioned.
*|asset.is-eol|* contains a boolean value that indicates if the asset is decommissioned or not.
*|asset.breadcrumbs|* contains a string with the ancestors path to the current asset
*|asset.state|* contains the current state's name of the asset
*|asset.definition|* contains the current "definition" of the asset, meaning its configuration. This is useful when you want to access to specific properties of the asset type: *|asset.definition.{system-field-name}|* . For instance you could access the "name" or the "icon":
*|asset.definition.name|*The "Asset type" name*|asset.definition.icon:url('page_card')|*The "Asset type" icon
*|asset.parent|* contains the parent of the asset. Do not use it directly, but access any properties of the parent, as you would do with the asset itself. For instance, if you want to access the parent's name, you should use *|asset.parent.name|*
Some examples:
*|asset.parent.state|* contains the state of the asset's parent.
*|asset.parent.breadcrumbs|* contains the breadcrumbs of the asset's parent.
*|asset.parent.definition.name|* contains the name of the parent's asset type
*|asset.parent.definition.icon:url('page_card')|* contains the icon of the asset's parent's asset type.
You can also access the ancestors of the asset. The merge tag
*|asset.parents.{asset-type}|* allows searching any ancestors of the asset. You must use this merge tag in combination with the asset-type "slug", to determine which type of parent you are search for.
For instance:
*|asset.parents.warehouse|* would find the first ancestor of this asset of type "warehouse". Once it finds it, you can also use it to extract properties from this asset in the template: *|asset.parents.warehouse.address|*
Maintenance plans variables
*|asset.plannings|* contains the plannings of the asset, but you cannot use it directly.
You can refer to a specific planning using it's planning-slug
*|asset.plannings.planning-slug.next-date:date('d/m/Y')|*
*|asset.plannings.planning-slug.last-date:date('d/m/Y')|*
*|asset.plannings.planning-slug.status|*
Or you can just access a planning by the order in the list of available plannings for this asset. For instance, if you want to access the first planning for this asset, just do:
*|asset.plannings[0].next-date:date('d/m/Y')|*
*|asset.plannings[0].last-date:date('d/m/Y')|*
*|asset.plannings[0].status|*
Assets may also have a set of custom fields that can be configured depending on the Team you're working. When you need to show that field information for your asset, it is necessary to prepend "asset" to the custom field system name. For instance, if you have a custom field called "My custom field", you should use the following notation to access it:
*|asset.my-custom-field|*
Custom fields variables
Custom fields can be configured to be used in Tags, Apps and Assets (or Entities). Depending on the origin of that custom field, you need to add the prefix that indicates the location where that custom field resides.
For instance, we can configure a custom field, called "My custom field", which can be referenced:
*|tag.my-custom-field|* *|app.my-custom-field|* *|asset.my-custon-field|* , depending on whether the field has been placed as part of a TAG, an App or an ASSET.
Fallback : default value
It is possible to specify a default value if the VARIABLE we are referring to has no value.
So, for example, you can specify:
*|asset.field||tag.field|*
Which means: when the TAG_VARIABLE has no value, then use the value of TAG_FALLBACK_VARIABLE
Filters
You can also use filters on your variables to transform the value of a variable. These are the currently supported filters:
url
The url filter allows to extract a URL for a file/image present in a variable
*|tag.photo:url('page_card')|*
The optional parameter specifies the "format" of that media, which refers to the "dimensions" of the given image. Currently available there are: "page_card" and "page_thumbnail"
localize
Uses the "current locale" to conditionally show a text.
*|FILTER:localize({"en":"English","pt":"Portuguese"})|*
date
A filter of type "date" allows you to format a variable containing a date in different ways:
*|tag.date:date('Y')|**|asset.last-maintenance-at:date('Y')|**|asset.last-maintenance-at:date('m-Y')|*
But you could also use date with now to create a timestamp, for instance:
*|now:date('YmdHis')|*
You can find all available formats in Date Formats
Functions
You can also use functions in your templates to control the information displayed based on a variable. These are the currently supported functions:
IF / ELSE
You can use the IF() function to control the information displayed based on a variable
Here are some examples of the use of the IF :
{{ IF(*|asset.field|*, "A2 was true", "A2 was false" ) }}
{{ IF(*|asset.field|*, *|asset.field|*,"A2 was false") }}
{{ IF(*|asset.field|*, *|asset.field|*, *|asset.another-field|*) }}
{{ IF(*|asset.field|* = "foo", "<div>Your HTML HERE!!</div>" ) }
ASSET_URL
You can use ASSET_URL function to get a direct link to an asset, even if it does not have a tag sticked to it. It requires the id of the asset as only argument:
{{ASSET_URL(*|asset.id|*)}}
ASSET_QR
You can use ASSET_QR function to get a QR code for an asset, even if it does not have a tag sticked to it.
{{ASSET_QR(*|asset.id|*)}}