Forms
Forms
TicTAP forms are one of the most versatile tools in TicTAP. With them, you can create from maintenance sheets to contact forms
Create the template
To create a form you have to create a new template, designate it as a form and give it a name. The form template allows you to add many more options than any other type of template, and allows you to link it to a history
Design your form
Once you are inside you can design your form to suit you by dragging the blocks you need:
- Text input: So that the user can write data such as their name, phone number, comments... You can set this field to be required to be filled in, or can only be filled in numerically.
- Date input: With this option the user can add a date, either the day the form is filled out, the date a revision is needed, etc.
- Slider: Add different options so that your users can
- Selection: With this block you can assign a series of options to a drop-down so that the user can choose one.
- Checkbox/Checkbox group: Add checkboxes and give them a description so that the user can mark them or not.
- Rating: Offers users the ability to rate or indicate the status of an asset or product.
- File upload: Allows your users to upload images, files or even add photos to your reports.
- History: Add a history to be able to visit previously submitted forms, easily and directly.
- Signature pad: With this block the user will be able to sign the form before to send it.
Use as many blocks as you need to design the form to suit you! As soon as you have created it, add the form submission button so that your users can register it and add it to your app.
Fill in and send the form
To access it, it must be well linked to your app. Scan the QR or the label of the app to which this form is assigned and visit it. From this moment it is 100% operational: fill it out and send it to be able to visit your report.
Scoring
Form Scoring feature
What is Scoring?
Scoring allows you to assign points to user responses in specific form blocks. When a user submits the form, a * total score* is automatically calculated based on the answers provided. This score can be used for evaluations, compliance checks, audits, training assessments, and more.
Which blocks support scoring?
Scoring is currently available in the following blocks:
- ✅
CheckboxBlock - ✅
SelectBlock
How to configure scoring
1. Go to the Settings tab
In the form editor, select a Checkbox or Select block, then open the Settings tab.
2. Open the Scoring section
Click on the Scoring accordion to expand the configuration panel.
3. Assign points to each response
You can define specific points for each response option.
✅ Example with Checkbox block
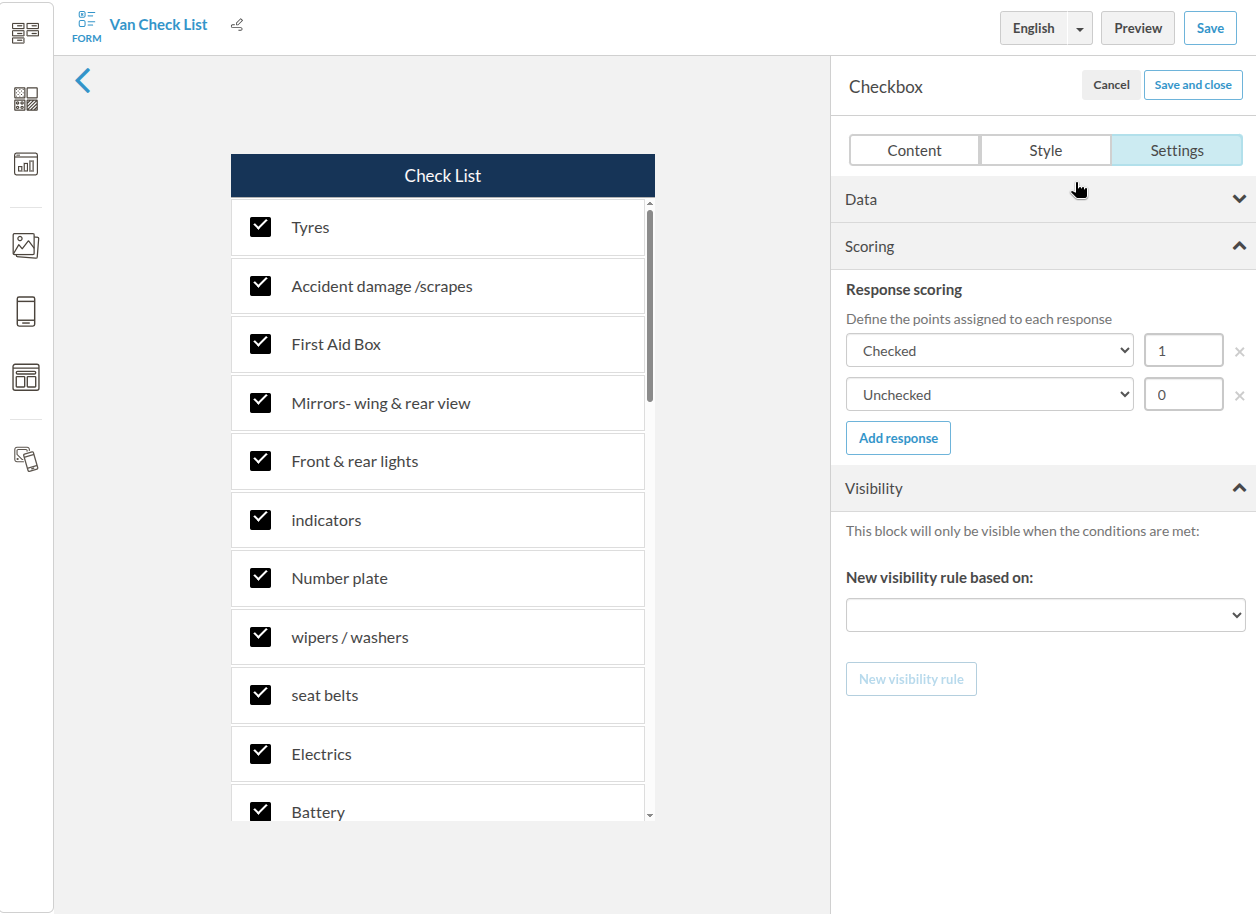
Checked: 1
Unchecked: 0
✅ Example with Select block
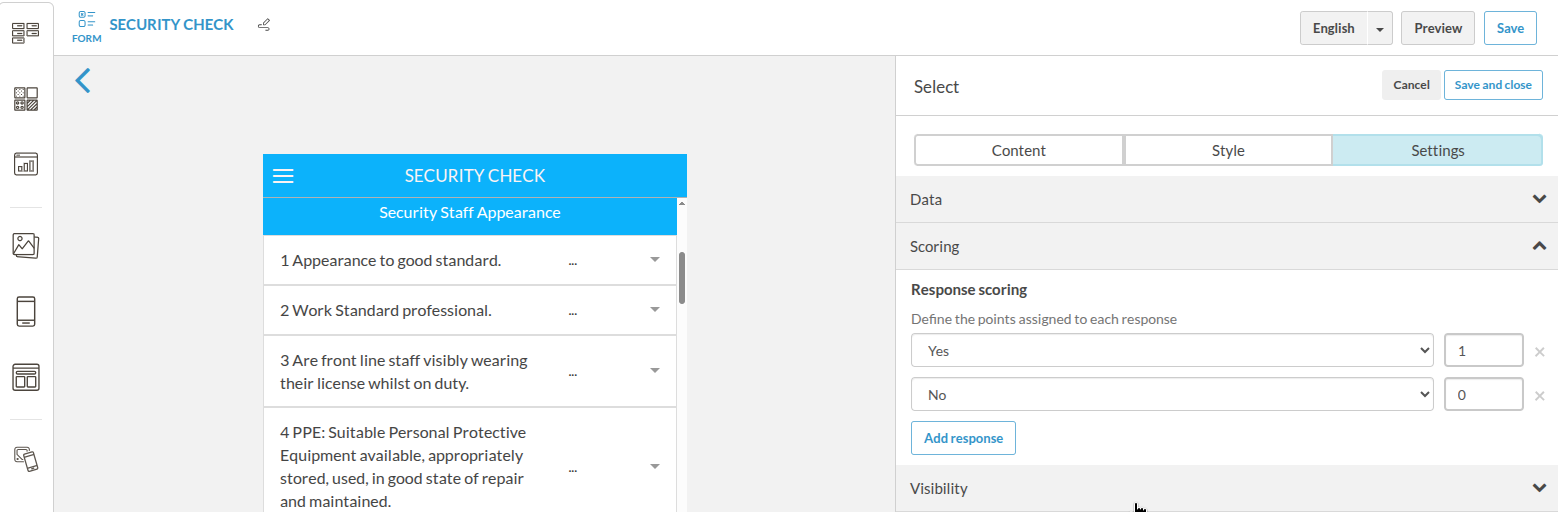
Yes: 1
No: 0
✅ Example with decimal values
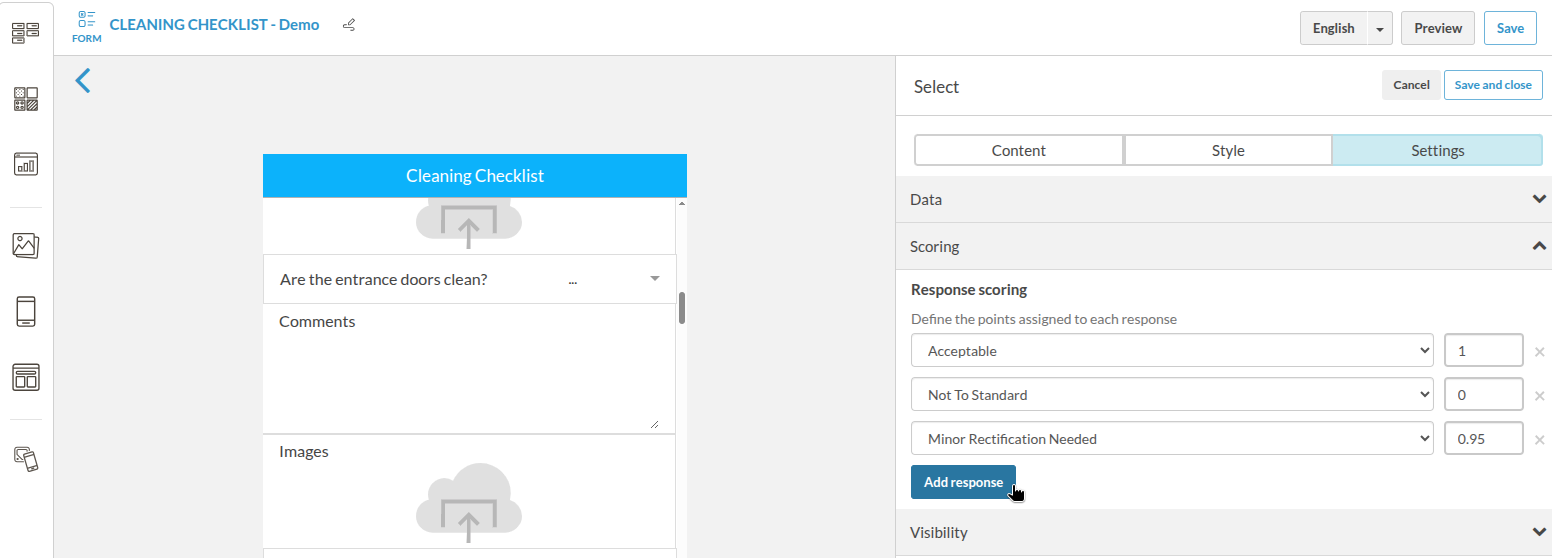
Acceptable: 1
Not To Standard: 0
Minor Rectification Needed: 0.95
- 💡 If you don’t assign a score to a response, it does not count it as a possible response.
- 🎯 You can use integers or decimals (e.g. 0.5, 0.95).
Where is the score shown?
After submission, the system automatically calculates and displays:
-
The total score as a fraction and percentage.
-
The individual score per question.
Example:
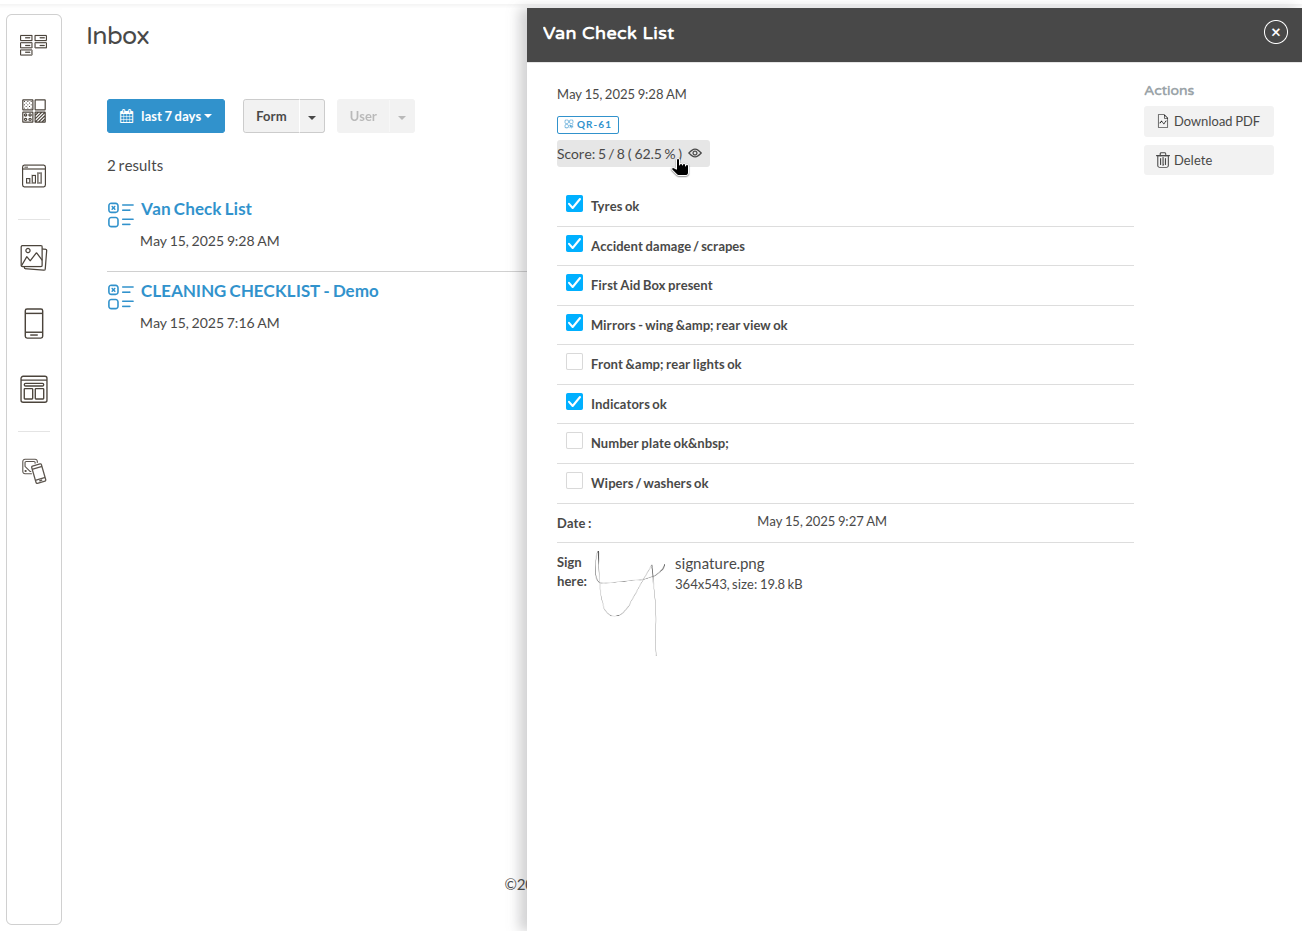
When clicking on the Score, the table with the summary appears:
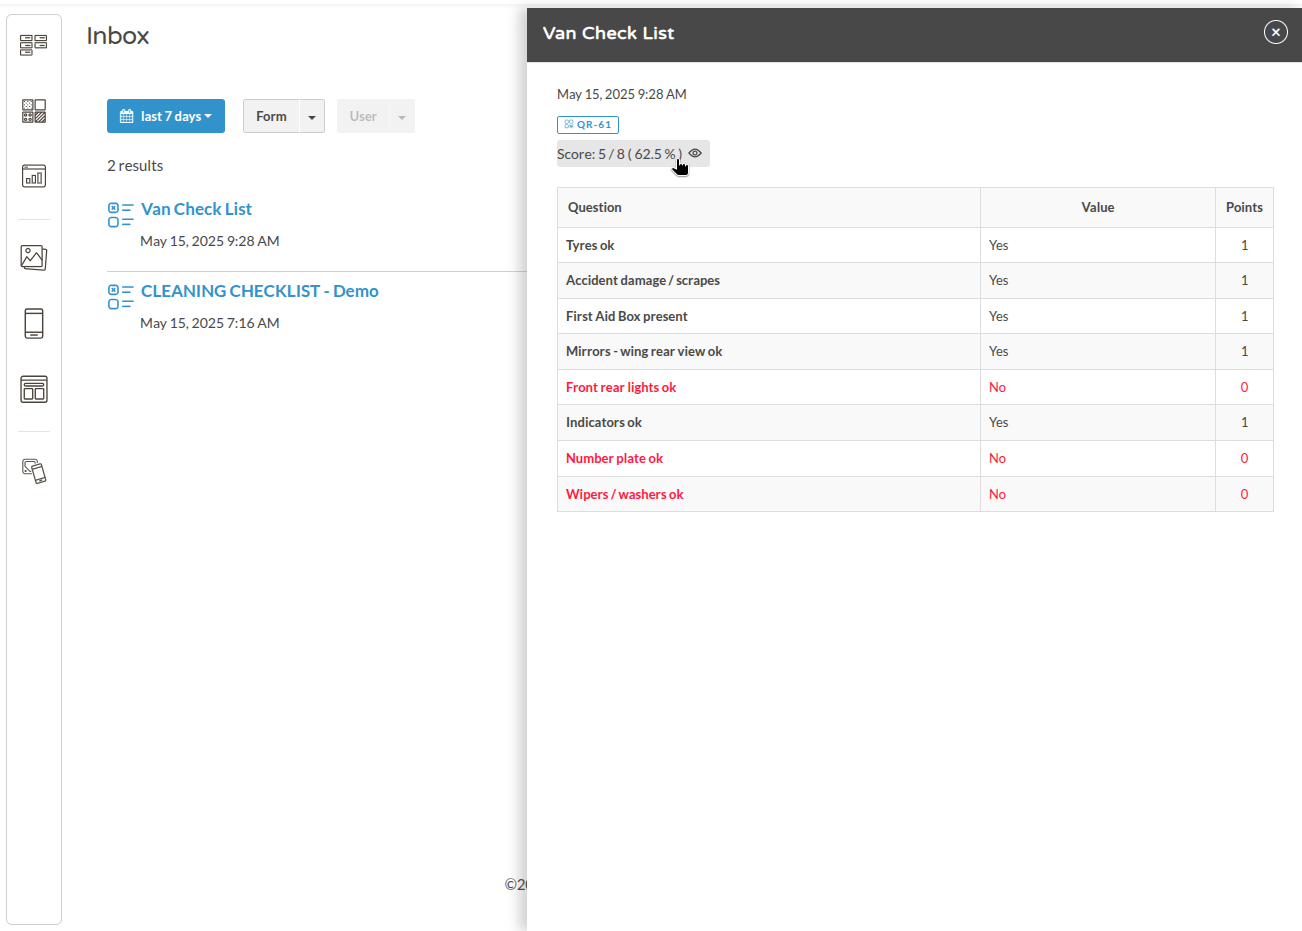 The detailed submission view shows:
| Question | Value | Points |
|---|---|---|
| Tyres ok | Yes | 1 |
| Front lights ok | No | 0 |
| ... | ... | ... |
The score is visible in:
-
📋 The submission detail view
-
📄 The downloadable PDF
-
🔄 API or CSV export (as a score field)
Use cases
✅ Maintenance or inspection checklists
✅ Cleaning and safety audits
✅ Internal training assessments
✅ Operational compliance tracking
Frequently Asked Questions (FAQ)
What happens if I don’t assign a score to a response?
→ The answer won't be taken into account
Can I use negative values?
→ No. Only 0 or positive numbers are currently supported.
Can I calculate scores by section?
→ Currently, only a global total score is calculated per submission.
Can I access the score via API or export?
→ Yes. The score field is included in submissions retrieved via API or exported as CSV.