App users
App User management
In TicTAP, App Users are users who interact with your applications by scanning QR codes or NFC tags. Their access and capabilities are defined by the roles assigned to them. This section explains how to manage app users within your team.
Accessing the App User Management Section
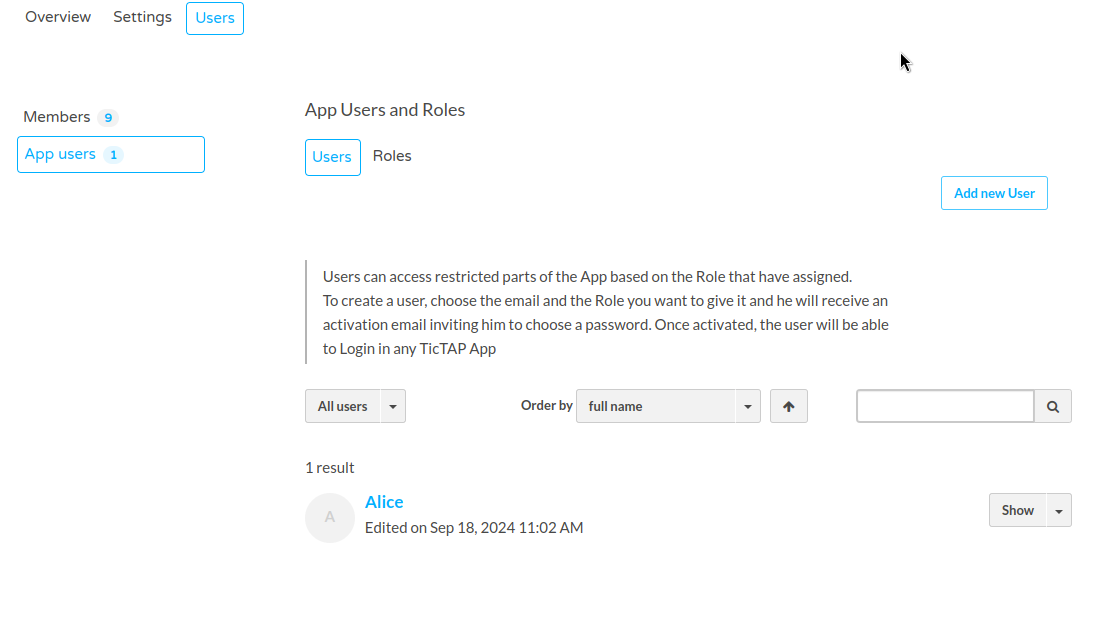
- Navigate to the Users Tab:
- Click on the Users tab in your team workspace.
- In the Members section, switch to the App Users tab on the left-hand side, as shown in the screenshot.
Adding a New App User
-
Click on "Add New User":
- To add a new app user, click the Add New User button on the right side of the screen.
-
Enter the Email Address:
- You will be prompted to enter the email address of the app user you wish to invite.
- Once entered, the app user will receive an activation email inviting them to choose a password and activate their account.
-
Role Assignment:
- Once activated, the app user can log in to any TicTAP app and will have access to restricted parts of the app based on the role assigned to them.
Managing Existing App Users
-
Viewing App Users:
- The list of app users appears below the invitation area. You can filter the list, search for specific users by name, and sort them alphabetically.
-
Editing an App User:
- Click the Show dropdown next to a user’s name to view or manage their details and permissions.
By managing app users and their access properly, you ensure that only authorized personnel can interact with your applications and data.
Role management
In TicTAP, the App User Roles define the level of access and permissions that users have within the app. You can assign roles to both app users and members to control what they can see and do. This section explains how to manage roles for app users.
Accessing the Roles Section
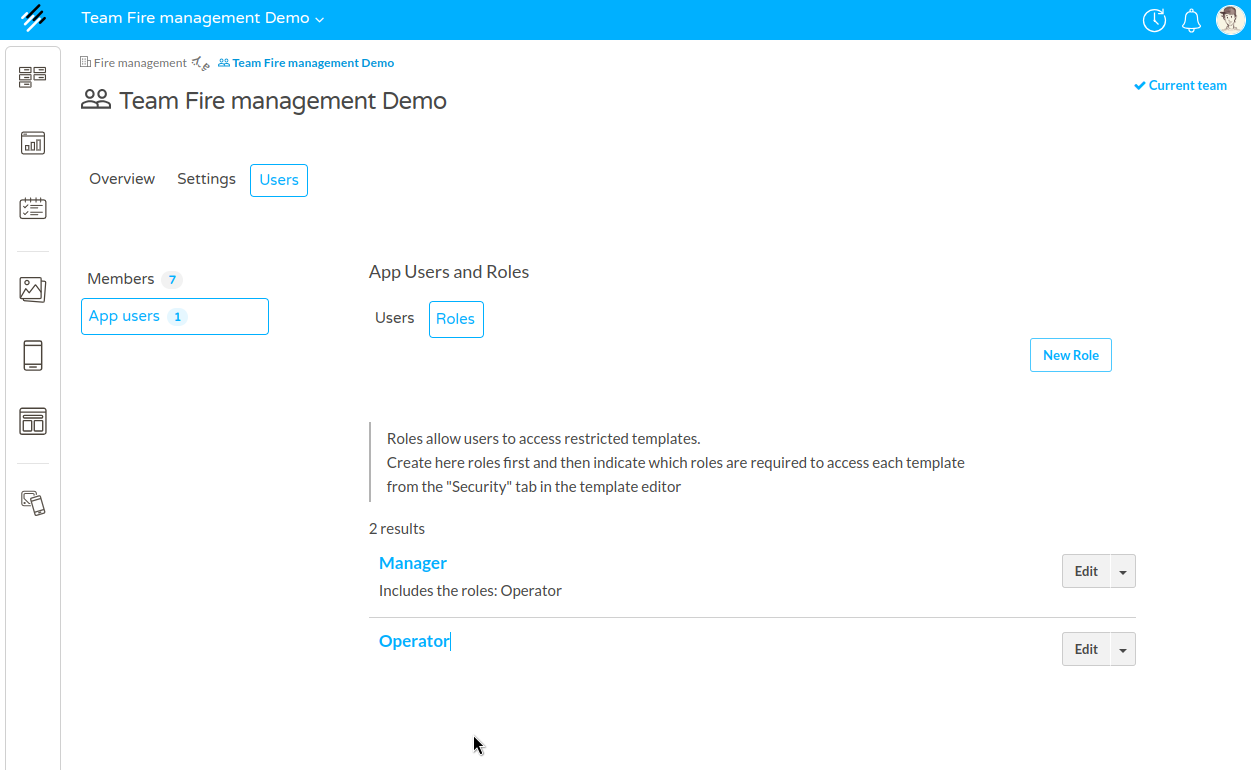
- Go to the Roles Tab:
- From the Users tab, select the Roles section on the right-hand side, as shown in the screenshot.
Creating a New Role
-
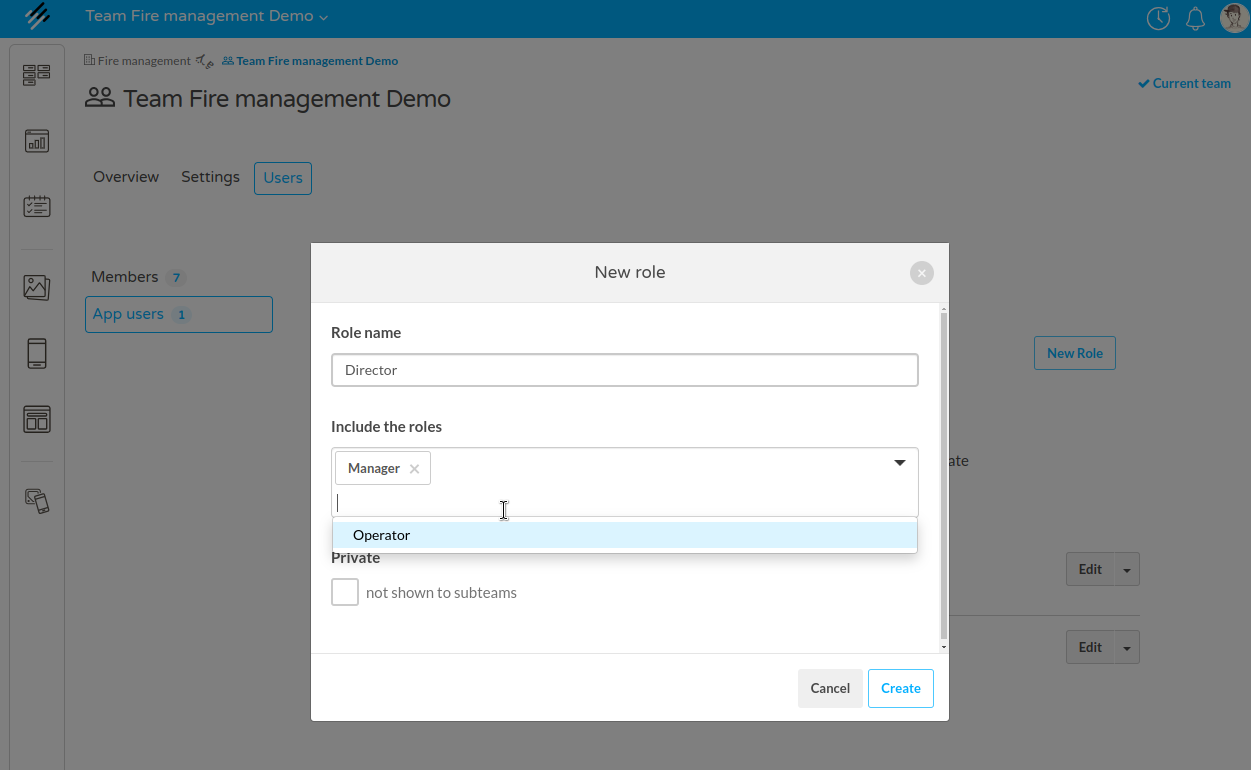
Click on "New Role":
- To create a new role, click the New Role button located at the top right.
-
Define Role Details:
- In the New Role dialog box, you’ll need to:
- Enter a Role Name (e.g., Director).
- Select the roles that this new role will inherit (e.g., Manager, Operator). This will include permissions from those roles.
- Optionally, you can mark the role as Private, meaning it will not be shown to subteams.
- In the New Role dialog box, you’ll need to:
-
Create the Role:
- Once the role details are set, click Create to add the new role.
Editing and Managing Existing Roles
-
View Existing Roles:
- The existing roles, such as Manager and Operator, will be listed in the Roles section. Each role shows its included permissions and any roles it inherits.
-
Edit a Role:
- Click the Edit button next to a role to modify its permissions or details. You can add or remove included roles and adjust its visibility.
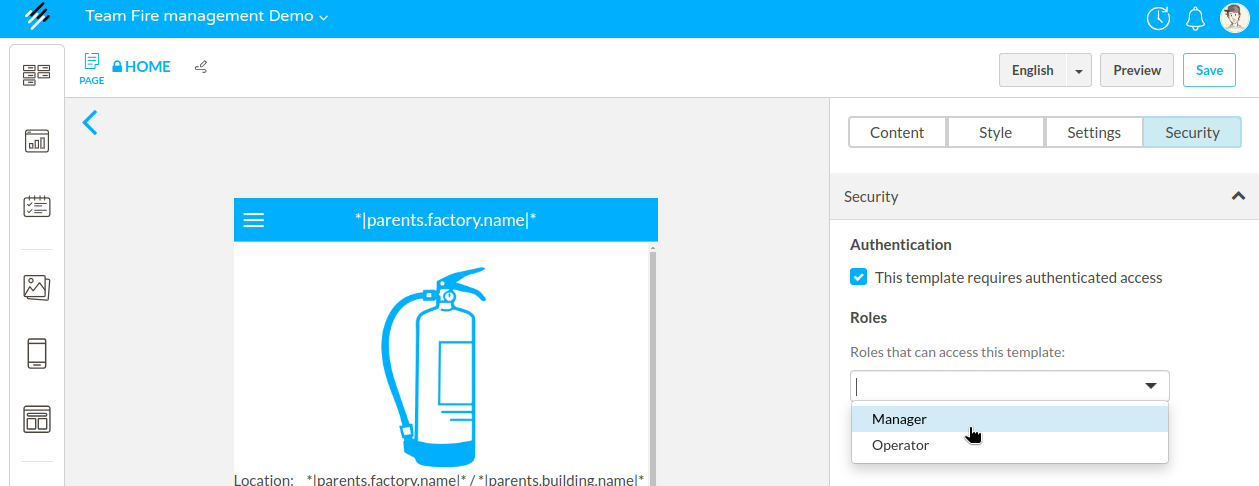
Applying Roles to Templates
Roles can be assigned to templates, allowing you to control who can access restricted content within the app. This is done through the template’s Security tab, where you can specify which roles are required to access the template.
By effectively managing roles, you can ensure that app users only have access to the sections and functionalities they are authorized to use, creating a more secure and controlled environment.
How to activate your App User
When a new App User is invited to your TicTAP team, they receive an email with an activation link. The user must complete a simple onboarding process to activate their account and gain access to the TicTAP platform. Follow the steps below to activate your App User account.
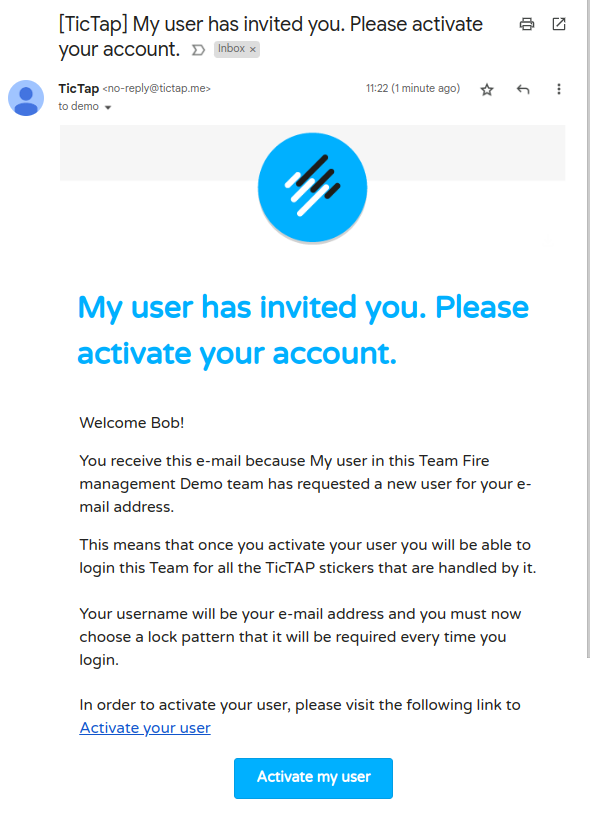
Step 1: Invitation Email
After being invited, you will receive an email from TicTAP with the subject: [TicTAP] My user has invited you. Please activate your account. Open the email, and you’ll see a message welcoming you to the team. Click the blue Activate my user button at the bottom of the email to begin the activation process.
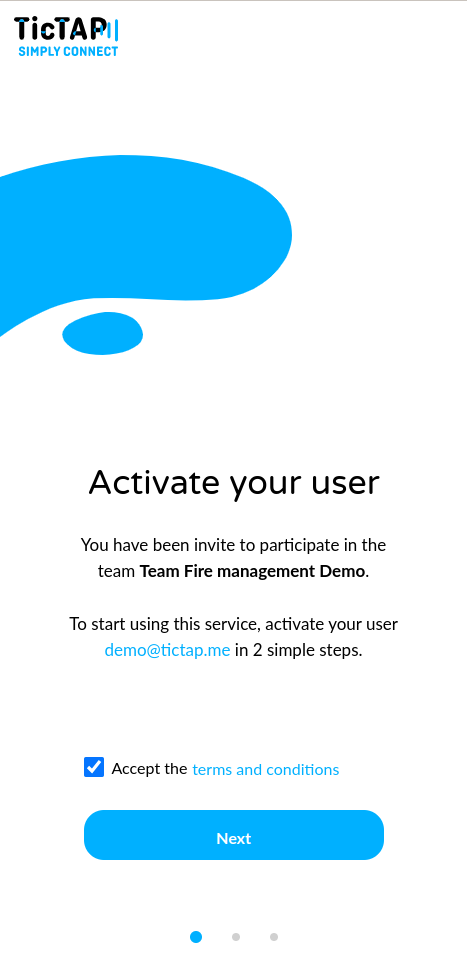
Step 2: Accept Terms and Conditions
Once you click the activation link, you’ll be directed to the TicTAP platform to begin the onboarding process. You will be asked to Accept the terms and conditions. To proceed, check the box next to Accept the terms and conditions. After accepting the terms, click the Next button.
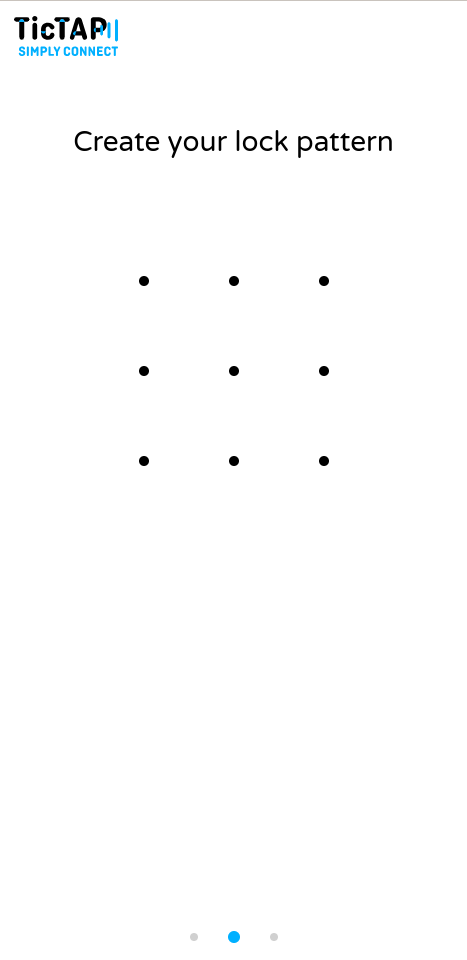
Step 3: Create a Lock Pattern
As part of the security process, you’ll need to create a lock pattern that will be required each time you log in to your account. Draw your lock pattern by connecting the dots on the screen. Make sure to remember this pattern, as it will be used for future logins.
Step 4: Activation Success
Once you’ve created your lock pattern, the system will confirm that your App User account has been successfully activated. You will see a confirmation message: Activation Success! Your username will be displayed along with the lock pattern you've set. You can now log in to any TicTAP sticker using your username and lock pattern.

Conclusion
After completing these steps, your App User account is fully activated, and you can begin interacting with TicTAP stickers. Use your email address as your username and your lock pattern for secure logins. Welcome to TicTAP!